Specifying the Plate Details
When you advance to the Select Plate Details page, you can do the following:
|
●
|
Manually set the scan mode, plate size, and plate type |
|
●
|
Import plate layout and details from an existing CFX run |
Note: For in-progress and completed runs, only the Plate Type can be modified.
Important: For accurate experiment data collection, ensure the scan mode, plate size, and plate type are set correctly for the physical plate and fluorophores you are using for the run. If you import a plate into a new run, the scan mode and plate size are set automatically from the plate being imported.
Plate details apply to all enabled wells.
To select the Plate Details
|
1.
|
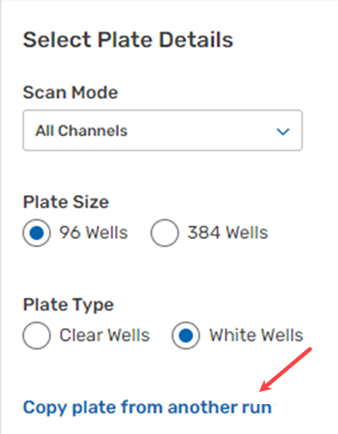
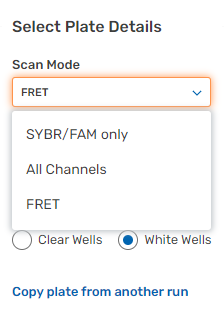
Under Scan Mode, keep the default fluorophores (All Channels) or select SYBR®/FAM only or FRET to instruct the instrument to collect data for the appropriate channels, as follows: |
|
●
|
If All Channels, the instrument collects data in channels 1–5 for 96-well plates, and channels 1–4 for 384-well plates. |
|
●
|
If SYBR®/FAM only, the instrument collects data only from channel 1. |
|
●
|
If FRET, the instrument collects data only from channel 6. |
Note: In the selected Scan Mode, data are collected for each channel in every well on the plate, and BR.io is currently compatible with factory-calibrated dyes only.
|
2.
|
Under Plate Size, keep the default (96 Wells) or select 384 Wells to reflect the physical plate and CFX Opus PCR system instrument. |
|
3.
|
Under Plate Type, keep the default (White Wells) or if you are running a plate with clear wells, select Clear Wells (not available for a 384-well plate). |
|
4.
|
Click Next Step to continue, and see Specifying the Plate Setup for information. |
To copy a plate layout from another CFX run
|
1.
|
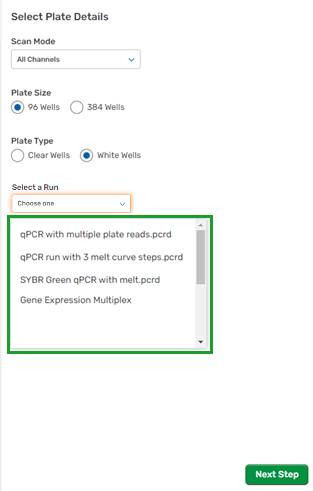
Click Copy plate from another run and then select a CFX run from the drop-down menu. |
Note the following:
|
●
|
If you are copying a plate into a new CFX run, the scan mode and plate size are set when the plate layout is imported. |
|
●
|
If you are copying a plate into an in-progress or completed CFX run, the drop-down menu displays only the runs with matching scan mode and plate size. |
|
●
|
Changing the scan mode or plate size after the import restores the plate layout to its default state. |
|
●
|
As you scroll past the initial 25 entries, more are added to the list until all relevant entries appear |
|
2.
|
Under Plate Type, keep the default (White Wells) or if you are running a plate with clear wells, select Clear Wells (not available for a 384-well plate). |
|
3.
|
Click Next Step to continue, and see Specifying the Plate Setup for information. |