
Configuring a Melt Step
A melt step collects fluorescence data at specified temperature intervals between a starting temperature and an ending temperature, and is used to perform melt curve analysis.
Note: Melt steps automatically include a plate read (represented by the camera icon) at the end of the step.
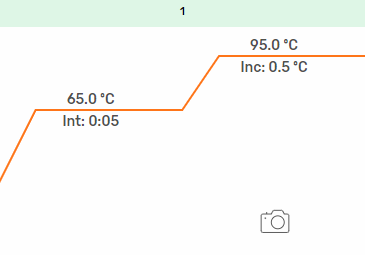
Melt steps in the graphical display appear as shown below.
To add or edit a melt step
| 1. | Select Melt from the Type dropdown list. |
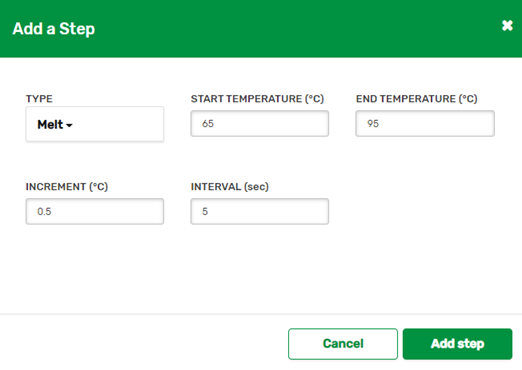
Note: In the above example, when executing the melt curve the instrument increases the temperature from 65° C to 95° C in increments of 0.5° C. The instrument holds at each temperature for 5 seconds, and then acquires the fluorescence for a total of 61 measurements.
| 2. | Verify or change the existing values. The fields are explained in the following table. |
|
Parameter |
Description |
Range |
|---|---|---|
|
Start Temperature |
Target temperature for the start of the melt |
0–100° C |
|
End Temperature |
Target temperature for the end of the melt. |
0–100° C |
|
Increment |
Value to increase or decrease the temperature in each interval. |
0.1–10°C |
|
Interval |
Duration at which the instrument stops to perform a plate read. |
0–64800 sec |
| 3. | Click Add Step or Save Changes. |
The melt step is added or changed.
| 4. | Do one of the following: |
| ● | To add another step to your protocol, add the step and select the step type. For information, see the Help page for the specified step type. |
| ● | If you are finished creating or editing the protocol, click the Add button or Save button, respectively. The Manage |