
Editing the Plate
When you click Continue to Plate Setup, the plate view opens. All wells display the default configuration.
Note: BR.io accepts standard and deepwell plates.
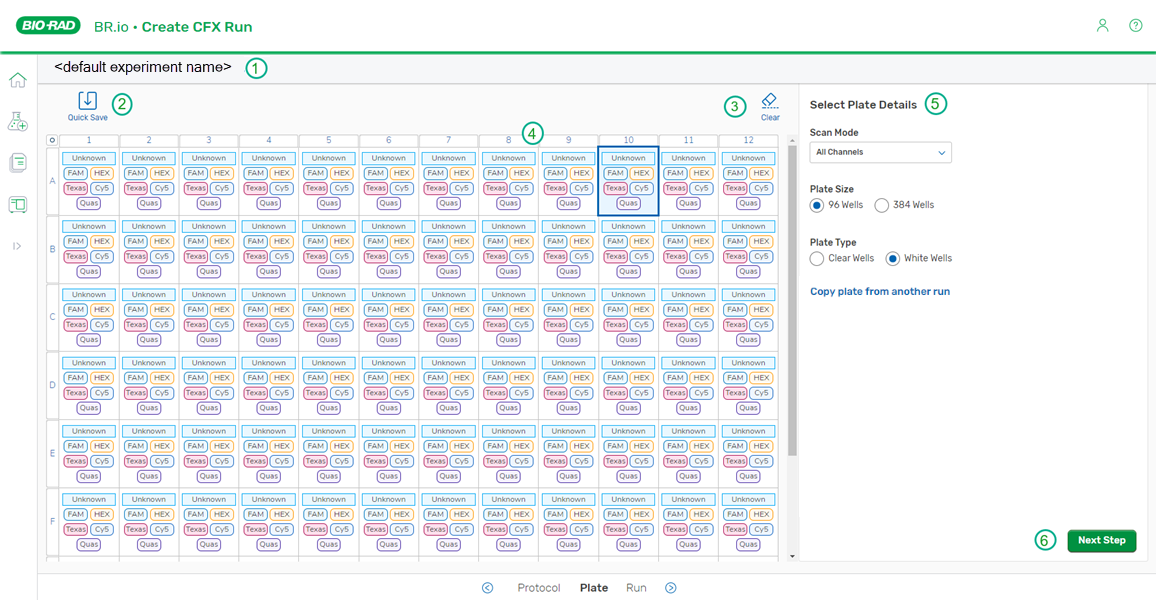
Your plate setup instructs BR.io how to analyze and display the information collected by the instrument in the completed run file. The main elements are identified in the following graphic, and described in the associated legend.
Note: The run setup order appears in the bottom navigation bar, with the active process highlighted.
|
|
File name. A default name is assigned initially; you can rename the file in the Run Details page. |
|||||||||||||||||||
|
|
Quick Save option, which allows you to save as you configure the plate. |
|||||||||||||||||||
|
|
Clear option, which allows you to clear the contents of selected wells. The option is enabled when you select a well. |
|||||||||||||||||||
|
|
Plate layout section; selected wells are highlighted with a blue border.
The Plate Layout contains Target Tags and Sample Tags (described below), which convey the contents of each well:
|
|||||||||||||||||||
|
|
Panel for entering plate information, which changes based on the setup step:
|
|||||||||||||||||||
|
|
Clicking the button moves to the next setup step. |


Note the following:
| ● | You can edit the plate before, during, or after the run. |
| ● | If you have navigated to another page, use the Plate link in the CFX workflow navigator to return to the plate editor. For information, see Using the CFX Workflow Navigator. |
| ● | You are not required to create or edit a plate layout before executing the run on the instrument. To defer the full plate configuration, ensure that you have properly set up the Plate Details and then skip to Specifying the Run Details. |